


Article overview
Static websites have fixed content with no backend processing. They can contain HTML pages, images, style sheets, and all of the files required to render the website, but there is no server-side scripting or database. If desired, the web pages can provide interactivity and run programming logic by using JavaScript, which runs within the user's web browser.You can easily host a static website on Amazon Simple Storage Service (Amazon S3) by uploading the desired content and making it publicly accessible. No servers are required, and you can use Amazon S3 to store and retrieve any amount of data at any time, from anywhere on the web.
Objectives
After completing this Article , you will be able to:- Create a bucket in Amazon S3
- Upload content to an S3 bucket
- Enable public access to S3 bucket objects
- Update a static website hosted in Amazon S3
This Article Procedure requires approximately 20 minutes to complete.
Common Login Errors
Error: You must first log out
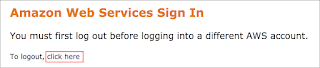
If you see the message, You must first log out before logging into a different AWS account:
If you see the message, You must first log out before logging into a different AWS account:
- Choose click here
- Close your browser tab to return to your initial Article window
- TYPE THE URL IN THE WE BROWSER : https://console.aws.amazon.com/?nc2=h_m_mc
- Then enter detail and Sign in then
Task 1: Creating a bucket in Amazon S3
In this task, you create an Amazon S3 bucket and configure it for static website hosting.
- In the AWS Management Console, on the Services menu, click S3.
- Note Click Switch to the new console on the top of the page if you see the option.
- Click Create bucket
- An Amazon S3 bucket name is globally unique, and the namespace is shared by all AWS accounts. This means that after a bucket is created, the name of that bucket cannot be used by another AWS account in any AWS Region until the bucket is deleted.
- Therefore, for this Article you will use a bucket name with a random number, such as: website-123
- For Bucket name enter: (Replacing 123 with a random number)
- For Region, select the Region value that is located to the left of these instructions.
- You will not be able to create your bucket in any other region than the region that your Article was launched in.
- In the section named Bucket settings for Block Public Access, you will notice that public access to buckets is blocked by default. The files in your static website will need to be publicly accessible, so you will need to permit access.
- Deselect (turn off) Block all public access.
- I acknowledge that...
- Click Create bucket
- Click the name of your new bucket.
- You will now configure the bucket for Static Website Hosting.
- Click the Properties tab.
- Under section Static website hosting section, click Edit button, Edit static website hosting window will open.
- Click Enable for Static website hosting.
- Click Hosting type as Host a static website
- For Index document, enter: (You will need to enter this even though it is already displayed)
- For Error document, enter: (You will need to enter this even though it is already displayed)
- Click Save changes
- Your bucket has now been configured to host a static website.
- From the Properties tab, under section Static website hosting , click Bucket website endpoint URL. You will receive a 403 Forbidden error because the website has not been configured yet. Keep this tab open in your web browser so that you can return to it later.
Task 2: Uploading content to your bucket
In this task, you upload the static website files to your bucket.- Right-click each of the following links and select save as and type the exact name Including Extensions and file type should be all type.
- Note Ensure that each file keeps the same filename, including the extension. You Can Download all the files to gather from the GitHub Repo (Recommended Option for the File to Download) https://github.com/CodeOnYT/Architecting-on-AWS
- Click the Object tab on the Bucket Overview window.
- Click Upload
- Click Add files
- Navigate to and select all of the files that you downloaded.
- Click Upload
- Click the Close button on the right of the Upload: status window to return back to the Bucket overview page.
- Your files are uploaded to the bucket.
Task 3: Enabling access to the objects
Objects stored in Amazon S3 are private by default. This ensures that your organization's data remains secure.- In this task, you make the uploaded objects publicly accessible.
- First, confirm that they are currently private.
- Return to the web browser tab that showed the 403 Forbidden error, and refresh the page.
- Note If you accidentally closed this tab, go to the Properties tab, click Static website hosting, and click the Endpoint link again.
- You should still see a 403 Forbidden message. This is good, because it indicates that your static website is being hosted by Amazon S3 but that the content is private.
- There are several ways to make Amazon S3 objects public:
- You can use a bucket policy to make an entire bucket or just a directory within a bucket public.
- You can use an access control list (ACL) to make individual bucket objects public.
- It is normally safer to make individual objects public because this avoids other objects being accidentally made public. However, if you know that the entire bucket contains no sensitive information, you can use a bucket policy.
- You will now configure the individual objects in the bucket to be publicly accessible.
- Return to the Object tab with the Amazon S3 console for the bucket (but do not close the website tab).
- Select all 4 objects.
- From the Actions menu, click Make public.
- A list of the 4 objects displayed.
- Click Make public
- Click the Exit button on the Make public: status window.
- Your static website is now publicly accessible.
- Return to the web browser tab showing the 403 Forbidden error, and refresh the page.
- You should now see the static website being hosted by Amazon S3.
Task 4: Updating the website
You can make changes to the website by editing the HTML file and uploading it again to the Amazon S3 bucket.Amazon S3 is an object storage service, so you need to upload the whole file. This will replace the existing object in your bucket. It is not possible to edit the contents of an object; you must replace the whole object.
- On your computer, open the index.html file in a text editor (for example, Notepad or TextEdit).
- Find the text Served from Amazon S3 and replace it with Created by YOUR-NAME, substituting your name (for example, Created by Jane).
- Save the file.
- Return to the Amazon S3 management console for your bucket, and upload the index.html file that you just edited.
- Select the index.html file and use the Actions menu to Make public again.
- Return to the web browser tab with the static website, and refresh the page.You should see your name on the page.
Your static website is now accessible on the internet. Because it is hosted on Amazon S3, it has extremely high availability and can serve high volumes of traffic without requiring any servers.
You can also use your own domain name to direct users to a static website. This involves the use of the Amazon Route 53 DNS service, which will be covered later in the course.
Conclusion Congratulations! You now have successfully:
- Created a bucket in Amazon S3
- Uploaded content to an S3 bucket
- Enabled public access to S3 bucket objects
- Updated a static website hosted in Amazon S3
End of Article Please Submit your Review.
1 star = Very dissatisfied2 stars = Dissatisfied
3 stars = Neutral
4 stars = Satisfied
5 stars = Very satisfied
Your feedback is welcome and appreciated.
If you would like to share any feedback, suggestions, or corrections, please provide the details in our
YouTube Channel : https://youtube.com/c/CodeOn
If you would like to share any feedback, suggestions, or corrections, please provide the details in our
YouTube Channel : https://youtube.com/c/CodeOn


